Now it is time to re-mask the whole car. I once again used duct tape on all the parts of the bottom of the car where the tape needed to stick to the backs of panels and the under-carriage which isn't as clean as it could be. I'm not worried about tape residue down there and regular masking tape just didn't cut it. Also, I opted for leaving the wheels on and covering them with garbage bags, though I've seen a lot of people pull off the wheels and mask off the axle and brake assembly. I suppose it might give you better access to spraying the very edges of the fender, but is a little too much work in my opinion. Either way, jack up your car and put it on stands if you can. This will make it harder to paint the roof if you are short, but easier to paint the bottom of the rocker panels.
Here you can see the duct tape against the back of the panel, ready for masking-paper to be applied.
I like to cut the paper out to the shape of the wheel, since it is faster than folding it all fancy and taping it taut. Here is the wheel well all taped up.
For the hatch of the car, I used an old leftover black-out shade. I taped the edge of the hatch with duct tape like the wheel well, and then rolled out the whole sheet of plastic (ie, the shade) and rough cut it to shape:
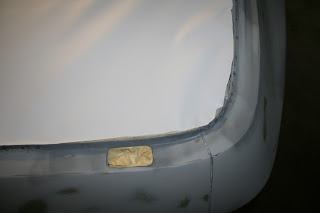
Then I went back with a razor blade and cut it just inside the edge of the hatch. This whole process only took a few minutes, and is much cleaner than using paper or a sheet of 2 mile plastic. You can also see the great back-taping job on the hatch pin closure area.
Here is the taillight and rear all taped up:
And here is the car from the front.
I chose to mask of the entire gas cap area, except for a small 1" lip inside the gas cap that will get painted. There is a ridge and then the rest of the enclosure that I'm not painting. I'll get a close-up of it after and it should look nice and natural. I also used an old sheet of cardboard for the rear windows. The front windows had masking paper run over the top, and deep down into the door interior:
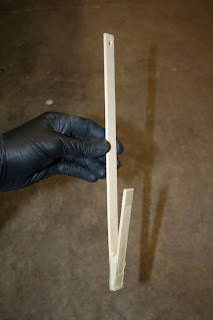
Remember those rain-gutters that I have hated so much. I don't know how a pro shop paints those, but I came up with a snazzy solution. I took a few paint stick stirrers the paint shop gave me, which are bamboo and about 12" long x 0.5" wide x 2mm thick. I taped two of them together, one long, one short, and taped another bit of one in the gap to hold them apart. Then I taped them all up so they'd stay splayed in a "J" sort of shape, with a hole drilled in the top:
On the bottom 'short' section, I added a bunch of tape so that it wedged nicely into the top fold of the raingutter rail, right at its fulcrum.
Then, I just put a nail in the top beam at the side of my booth, and hung each rain rail on it's own wood hook. They balance well enough that you can just life it from the bottom off the hook, and hold it to rotate the piece as you paint it. It would be tough to get all the angles of this thing without picking it up.
I also spent an hour walking around the booth as if I were spraying to check and make sure the pieces would be out of hose range, and to make sure everything was stable. I also found a few spots under the lights where the etch primer was a bit speckled and did some last minute sanding for an hour.
Time spent today: 6 hours (4 hours masking,1 hour arranging parts, 1 hour last-minute sanding.)
Money spent today: $5 (new roll of masking tape)


Great work! Thank you fro sharing such a great information with us. Mask your car door, hood fast & easily by tube tape Automotive Masking Solution.
ReplyDeleteNice post. you can mask your car door, hood, or trunk fast & easily by car green masking tape tube tape
ReplyDeleteMask your car door, hood gaps on trucks or cars, mask the a pillar fast & easily by tube tape. You can SAVE up to 30 minutes of masking time per car.
ReplyDelete