[Post editing note: After doing this work several months ago and posting this days' work, I was kindly informed by a fellow Porsche enthusiast that the body panels for the 944 are all STEEL. Oops! Adjust accordingly.]
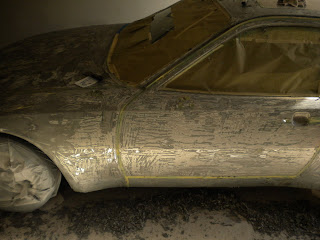
Next I started to pull off the tape that had been used to keep paint stripper out of all the grooves and seams of the car. The tape in most places had soaked up stripper which had been working on the paint under the tape. I pulled tape of the whole driver's side, and scraped off any paint underneath with the Triangle Scraper. Once again this was the perfect tool since I could place the pointy part of the triangle down into the seam (on the side of the hood for example) and it would scrape a nice even line of paint off the edge of the panel. I will not be removing paint off the jambs and hood interior, since they have original paint, no Maaco paint, and no rust or sun damage and should provide a good base for the new primer and paint. I spent 3 hours pulling tape and scraping paint from all panels edges on the driver's side.
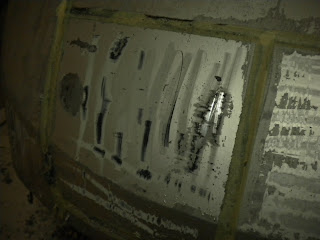
I started the day out buying a metal file from the hardware store. Try as I might to clean up yesterdays HTS "welds", nothing has worked. If I try to scrape them flush with Triangle Scraper, they pop out or get messed up. Sandpaper just isn't enough. So I bough a small metal-file set, and took off the handles and slowly filed each of the big jagged "welds" until they were perfectly flush with the car. It took 1.5 hours, but I was really pleased with the results.
Next I started to pull off the tape that had been used to keep paint stripper out of all the grooves and seams of the car. The tape in most places had soaked up stripper which had been working on the paint under the tape. I pulled tape of the whole driver's side, and scraped off any paint underneath with the Triangle Scraper. Once again this was the perfect tool since I could place the pointy part of the triangle down into the seam (on the side of the hood for example) and it would scrape a nice even line of paint off the edge of the panel. I will not be removing paint off the jambs and hood interior, since they have original paint, no Maaco paint, and no rust or sun damage and should provide a good base for the new primer and paint. I spent 3 hours pulling tape and scraping paint from all panels edges on the driver's side.
After way too much paint stripping, the car is finally all bare metal. (except for the passenger side seams which I'll get to tomorrow) Unfortunately, it has taken days and days, which means the bare aluminum has just sat exposed to the air, and has started to oxidize. To be honest. The metal looked pretty mottled as the paint was coming off, and it still looks pretty dark and mottled, so I can't see well how much it has oxidized. But, the paint shop, and every book says that you've got to spray aluminum within hours of stripping, or the aluminum will rust on a molucular level and that can inhibit good paint performance. (Ie, the primer won't stick well and will peel off over time.) It is time for me to re-do all the body work (Bondo-work) that I stripped off, so I figured I'd test out an aluminum cleaner that is supposed to chemically remove oxidation:
I went back to my local Sherwin Williams Auto paint store, and picked up a bottle of W4K263 Dual Etch Aluminum Brightener and Conditioner. (Don't get the W4K288. It is more common, but is for steel) It is the product on my Etch Primer spec sheet that should be used to pre-treat aluminum before spraying etch primer. I bought one quart for $25. It is supposed to be diluted 1 part with 2-4 parts water, so it yields about a gallon of acid-wash. I mixed it in a quart sized paint mixing cup.
I used a maroon scotch-brite to apply the W4K263 (which I will call acid wash, even if that is totally wrong.) to a few areas that needed bondo work. (don't forget thick gloves and tape up spots where you don't want the acid to go, like into the engine compartment) The theory is to let the panel stay wet with the stuff for 3-5 minutes, which converts all the rust (aluminum oxide, AL2O3), to something else more stable. Then you rinse it off, dilute the acid, and then have nice clean metal that will stick well to Bondo and not rust.
The acid wash evaporated pretty quickly, and made the metal look all streaky. I ended up having to spend the whole 3-5 minutes re-applying more liquid every 30 seconds. This also had the side benefit of me lightly scrubbing the area as the liquid sat there, helping more aluminum oxide to get scrubbed off. The last minute I scrubbed pretty aggressively. Here you can see how the rear quarter-panel is smooth and light (that's the treated panel) while the rest of the car is mottled and dark. (trash bags keep this stuff off the rubber tires.) I spent 2 hours acid washing all the spots that were going to need Bondo, and then rinsed off the spots with water:
Next up was bodywork time. I've already logged a few hours of bodywork for the 'welded' holes.But now was time to start in earnest. There are 4 or 5 areas where I'll be doing some substantial Bondo repair. Most of these areas already had a professional body-shop get the metal pretty close, but I wanted to strip out the bondo to make sure everything was uniform and that there wasn't anything underneath that I need to worry about. And I have always wanted to try my hand at Bondo, and never have.
I'll spare you the details of working with Plasticized Filler (Bondo) since there are lots of tutorials out there. I was pleasantly surprised how easy the stuff was to work with. I didn't have any tools to work with it, so I bought a smooth plastic mixing board, (8"x6", $4). And a set of 3 application spatulas ($5). The filler was a quart of Evercoat Rage for $21.
I filled in 5 areas that needed work with a nice first coat to get the panel mostly flat. My biggest tip working with this stuff, that I didn't quite grasp is that it cures in about 5 minutes. It is easiest to spread and lay onto a panel and make nice and smooth in the first few minutes, but you lose 1-2 minutes during the mixing process if you are a perfectionist, so you only have a short window, maybe 2 minutes max after mixing to get it on the panel. If you do it right after mixing, then it spreads like butter (ie, easy). If you walk around your car twice, and pause to scrape of a stray paint flake, and then try to spread it, it is stiff and unresponsive and doesn't lay down well, goes on chunky, and makes sanding a pain later. I ended up doing several small batches and laying it on fast after figuring this out.
Here the biggest fix on the car. Before, the shop had laid so much Bondo on this area that it had cracked and looked terrible. I managed to reshape the curve so it looked better and was far thinner than before. Maybe 1/8" at the deepest pit, and less than 1/16" over the majority of the area. It was probably close to 1/4" before. I was tired and decided to let it cure overnight and sand tomorrow.
Time today: 8 hours (3 paint removal, 2 metal prep, 3 bodywork (bondo and filing HTS)
Spent today: $65 ($25 for W4k263, and $10 for metal file, $9 bondo tools, Rage Filler $21)


