Now that all the sanding is done, I took the car out into the driveway and decided to give it a good hosing off. I wanted to get rid off all the sanding dust so that it wouldn't blow out of some crevice in the middle of the clear-coat and ruin everything. It took 1 hour. Here is the car seeing the light of day for the first time in 137 hours of labor:
I realized while washing the car that the spray-can etch primer I sprayed on after sanding came out of the can pretty rough, and mottled the nice 400 grit paint. So, I got out some 600 grit wet-sand paper and went over those spots with it. It only took a few passes of 600 grit to smooth things down amazingly. It was so fast, in fact that I decided to wet-sand the whole car down to 600 grit. It took about 3 hours to sand and squeegee the car dry, and only used one sheet of 600 grit wet-sand paper. I had some lying around, but that would have cost about $5 for 3 sheets. I'm using the smallest dura-block, which is 5.5" x 2.75" but is only 0.25 thick. It fits perfectly in a half-sheet of paper folded into thirds. To squeegee each area dry, I used the only block I hadn't used, the 11 x 1 x 1. It worked well for drying the panels enough that I could dry them with a shop towel.
Here you can see how smooth the primer is getting. The reflection from the lights isn't flawless just because there is residue in the sanding water.
Earlier in the project, I showed a picture of this same fender and you could see how much texture it had from the primer. Now it is smoother than a baby's butt. Really, I have several babies, and their butts aren't quite 600-grit-smooth.
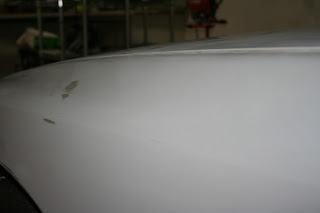
Here you can see the darker gray spot from the rattle can etch and you can see that it is well blended to the surrounding area. When wet, it feels indistinguishable from the rest of the primer.
In this next picture, you can see a great angle of the two headlight covers. The one on the left is 400 grit, the one on the right is wet-sanded to 600 grit.
Note: I left several spots with rattle can primer exposed, and several other spots with green 2k etch primer exposed. I thought that you could spray primer-sealer over these to seal them. It turns out they will react with the paint. So I SHOULD have sprayed down some more primer to cover all this etch. But I didn't. Oops.
Total time spent: 4 hours
Total money spent: $0


No comments:
Post a Comment