
I've done a bit of research, and '944time' had the best overall info. It turns out that the Porsche 944 bumper is thermoset polyurethane. He even links to a nice textbook from demarlearning.com about plastic repair that is pretty comprehensive. Burton, who I've referenced before many times, also has a good writeup on plastic repairs.
This is my Porsche 944 front spoiler, or air-dam, and it's associated tears, burrs, and cracks. First is the central support that is torn from the bumper folding down and in half at curbs:
The same thing is happening to the driver-side vertical support:

And the passenger-side vertical support:

There were some really expensive and fantastic looking plastic repair materials at the local automotive paint store, and some pretty lousy ones at the local Shucks and Autozone. I opted for the bottom of the line plastic repair kit from the Auto Paint Store. (Which happened to be the only one that cost less than $300, and didn't require a special caulk-gun thing to apply) It is SEM brand Plastic Bumper Repair two-part "stuff" ($10). I don't know if it is epoxy, or plastic, or what. They tell me it will work great on my polyeurethane bumper.

Following direction on the package, I started by cleaning up the area that will be getting the epoxy. I used a B&D Mouse Sander, which has a little sanding arm that works well to get between the spoiler edges. I sanded all the way down to the black plastic:

Don't forget to sand the bottom too! I'm going to be applying a bunch of extra epoxy to the bottom to provide some extra support, and because I have a whole tube of the stuff.

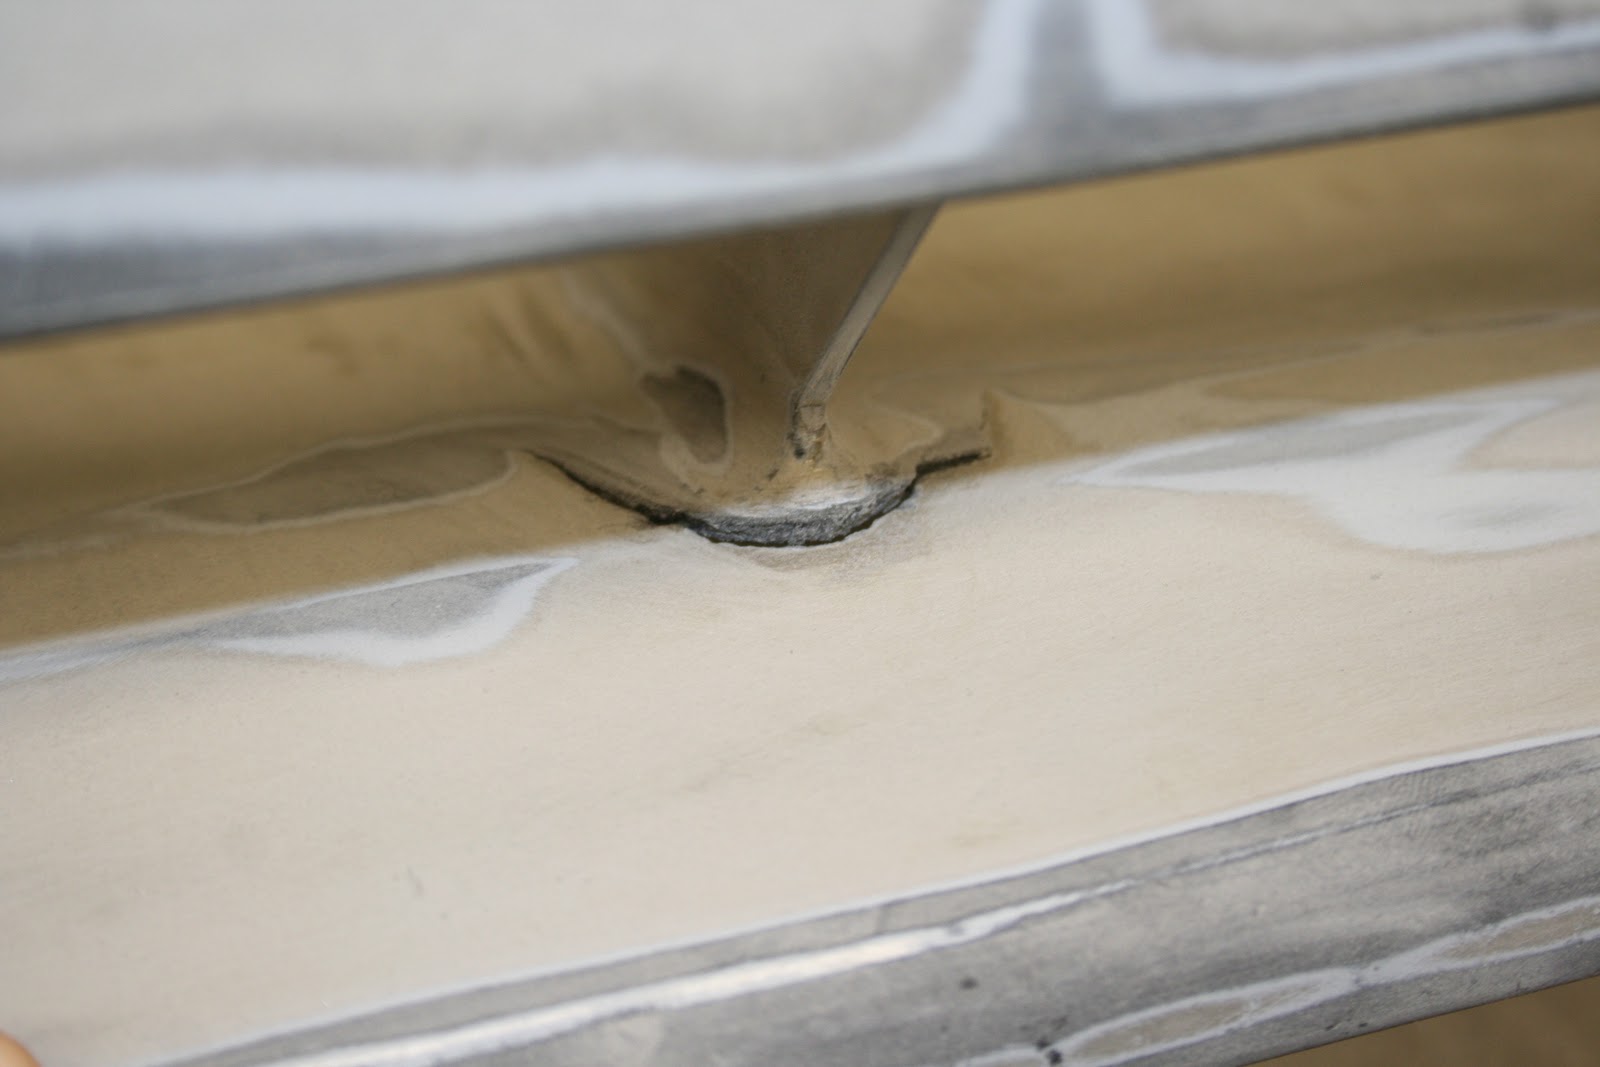
In addition to sanding the are, you also have to cut out a groove that the epoxy will sit in. If there is no groove, then when you clamp everything together, there isn't enough epoxy in the void to hold it all together. So this gives more surface are, and allows for more aggressive sanding after the repair to leave things all flush. It is kind of a "v" shaped notch all along the cut. A sharp carpet cutter or X-acto works well.You can see the groove here as it stands out against the light paint"

Here is the same groove after sanding. I sanded well past the area I think will get epoxy since I don't know how much I'll spread on.

Here I've applied some 2-part epoxy, and have just mixed it on the bottom side of the spoiler. It is kind of like slightly-runny peanut butter. I'm working on this vertical surface and it is just barely dripping. Better work horizontal. I made sure to smush a bunch of epoxy up into the gap from below.

Next up, I mixed up some more epoxy for the top of the spoiler. Here you can see I've done half of the area. You can also see that the crack is well-filled from the bottom. I decided to do the top and bottom simultaneously. This would allow me to set the angles of the spoiler just right once, and because I didn't seel like waiting for it to dry twice:

Here you can see where I've just squirted the two-part epoxy before mixing:

After mixing and smoothing:

Here's the same spot from a lower angle with both sides all smoothed out as best as I could with my little spreader (a small piece of folded up cardboard. You could probably use a putty knife, but these are pretty close quarters and a full size putty knife might not fit.)

This is probably overkill but I wanted to make sure it was tightly held at the perfect angle until it cured. I used a wood clamp to make sure it was just right, and left it for about 30 minutes.

Once it has fully cured, you can go back and sand off the excess. In this case, I left a bit of build-up on it and created a new tapered edge to give the joint more strength. This piece is pretty low, so unless I take this thing to a show, I doubt you could notice it:

Here's an eagle eye view from above the repair:

Here is a better angle where you can see how smooth and feathered the edges are. I spent a lot of time sanding this so it would look just right:

I repeated the process for the two side supports of the spoiler, which weren't nearly as bad, and for one of the mounting bolt-holes on the side. I used about half of the epoxy that I bought on the four repair areas.
I also noticed that the spoiler had a little bit of excess curve on the right side from where the mounting arm had cocked to one side for a few years. I used a propane torch moving quickly over the affected part of the spoiler with direct heat for a minute until it was super-hot to the touch. Then I used my hands to fold and push the panel excessively in the opposite direction, over-beinding it past where I wanted it. I held it like this for a minute, and then let it go, allowing the spoiler to reform to original shape. It took twenty minutes to get it just right, but was worth the time. (You could easily do this one with the spoiler on the car if you were lazy.)
Total time spent: 3 hours
Total Money spent: $10 for epoxy
Wonderful blog & good post. Its really helpful.
ReplyDeleteFor more Info: bumper repair Abbotsford
Mechanic Servicing Perth, Accredited Log Book Service. Audi, BMW, Mercedes Benz, Mini, Porsche & VW Specialists. Servicing German cars in Perth since 1999
ReplyDeletePorsche specialist
Great and very informative post for Bumper repair. Please keep it up! If u want more information click on Bumper repair Melbourne!
ReplyDeleteAwesome blog and good post.
ReplyDeletefor more info
Car Dent Remover
Thanks
sushmasen
Great post on painting your 944. Very informative.
ReplyDeleteClassic cars body work
Classic car restoration
Vintage car restoration
This is a great and informative post with regards to Bumper Plastic Repair, thank you very much.
ReplyDeleteFor more please visit - https://midrandautobody.com/mobile-paint-sprayer/
I really loved reading your blog. It was very well authored and easy to understand. Unlike additional blogs I have read which are really not that good. I also found your posts very interesting. In fact after reading, I had to go show it to my friend and he enjoyed it as well!
ReplyDeleteAutomotive Painting Repairs
I wanted to thank you for this great read!! I definitely enjoying every little bit of it I have you bookmarked to check out new stuff you post.
ReplyDeleteAuto Scratch Repair Service
Front bumpers are highly vulnerable to scrapes, cracks, and curb damage. Applying Paint Protection Film provides an extra layer of defense against scratches, stone chips, and everyday wear, helping preserve your vehicle's finish and reduce future repair costs.
ReplyDelete