
I started the day spending another hour finishing up the taping. Here you can see that I have taped up the windows, hood edges, and the windshield area as well as the door handle holes and antenna hole. This will keep acid from getting into the car. I've also put tape over all the spots that have bondo on them. The sunroof, which still has unsanded bondo, is papered over, and the seams have been taped with it installed. You'll notice I didn't tape up the door jambs since I figured I could just rinse them well if any acid got in there:

Then the car was rolled out to the driveway to get acid washed. Here you can see my mixing cup with the acid and my maroon scotchbrite. I already talked about materials and technique using the acid wash (W4K263). I mixed it 1 part acid to 2 parts water to get a fairly strong mix:

Start by choosing a panel of the car, preferrably the top, so any errant acid can be picked up later. I started with the roof, being careful not to get any in the hatch area, which wasn't taped up. I wouldn't do more than 5-6 square feet at a time.
Next, you kind of "brush" on the acid over a panel of the car. (It is the consistency of water, so it doesn't really brush on, maybe more of a pouring/scrubbing motion as it drips from the scotchbrite pad) It foams slightly and you can see white residue start to form. It's kind of like pouring hydrogen peroxide on a wound. It took me about 45 seconds to continually dip the scotchbrite pad, and brush on acid over half the hood. By the time I'd finished half the hood, it had already started to dry where I started, or had dripped off the car. I started the same small section again and this time was more agressive with my brushing-on/scrubbing motion, each time using fresh acid. This process was reapeated until the 5th or 6th time when I scrubbed pretty hard and the metal lightened substantially. After 5 minutes total on this half-panel, I got the hose and carefully rinsed the stuff off, away from the untreated panels. Then I used compressed air (don't let oil from your compressor get on the panel) and clean shop-towels to dry off the panels. Here you can see the hood and the difference this scrubbing/treatment makes. Can you guess which half has no more oxidation (rust or Al2O3)?

In this picture the entire hood area is complete. You can see that on the sides of the hood, I scrubbed from front to back, and in the middle of the hood, where it was harder to reach, I went side-to-side. The scratches aren't deep, and are catching the light just so:

It took about 3 hours to do the whole car (including today's masking and taping which was about 1 hr.), and then to go back and ensure that it was rinsed off really well. In spots that weren't well rinsed, there was already some brown rust starting to form. I scrubbed most of the car with water and a new scotchbrite. (The acid doesn't smell bad and isn't pungent, but I wore my mask just in case.)
After letting the car air-dry totally, I pulled it back into the garage to where I wanted it to be for spraying. It is hard to move the car once the windshield and doors and tires are all taped. Then I pulled off all the tape and started taping for the etch primer. Here you can see the windows and sunroof and bottom of the car are all masked off:

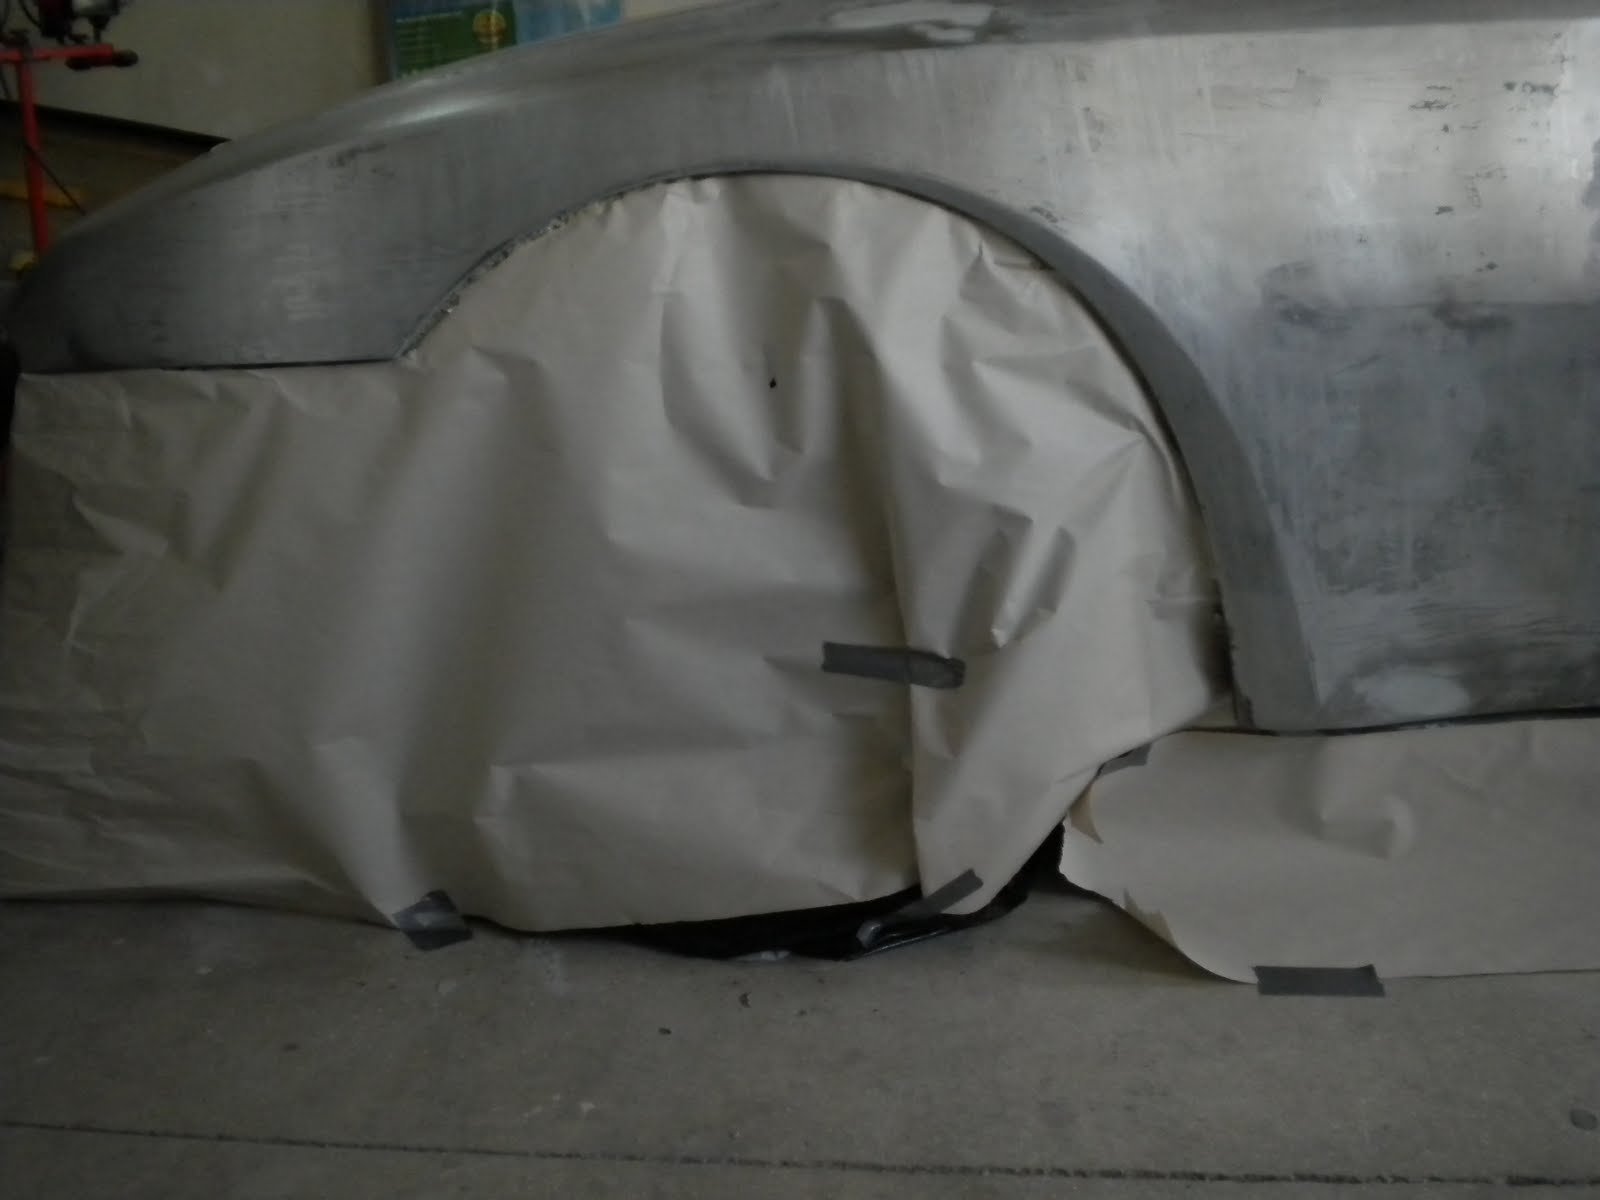
Quite frankly, the bottom of the car was the biggest pain in the masking process. I tried using masking tape, but realized I hadn't cleaned the undercarriage of the car enough for tape to stick to the bottom or back of panels. Boy, I wish I would have taken 5 minutes to scrub them off earlier in the process.
I grabbed a ton of duct tape, and just ran it below the panels and then pushed paper up to it. Then, I used a razor blade to carefully cut the paper just 1 mm away from the panel, so that there wasn't any paper on the panel. This gave a nice good line, and prevented me from having to fold the paper all oragami-like to get it to fit. Here is a finished wheel:
I also taped the paper to the floor (which was broomed and scrubbed clean first):

Here you can see a close up showing the masking tape covering the edges of the door panel, but allowing paint to get to the sill of the window. I left the rear-quater window taped with duct tape from earlier in the process. I'm not too concerned about this edge since there is about 1.5 inches that is covered with the thick rubber seal of the rear window:

You can also see that before taping the doors I was able to tape the door handle holes from inside the door panel:

Same idea for the antenna hole, rear-view mirror holes and rear-license-plate light holes:

The toughest thing to tape up were all the gaps. You can't lay tape right over the gap (like I did when stripping the paint), since you'd end up with a part of the visible panel not getting paint. So, you have to back-tape. I read about this in a few books and could not understand what they were saying. It was only until I was confronted with the problem that I got it. I'll try to explain using the hood as an example.
Standing facing your car at the front, and with the hood open, run a line of tape (I used 3/4") along the edge of the hood that is facing you. The tape will be sticky side away from you. You want the bottom edge of the tape to be about flush with the bottom edge of the hood. This will leave a bunch of tape extending higher than the edge of the hood, kind of where it looks like it shouldn't be. This is good. (for now.)
Next, run a line of tape along the edge of the engine compartment right there by your legs. Since that panel is between you and the engine compartment, the sticky side of the tape will face you directly. Again, you will want the bottom edge of the tape high enough that some tape is sticking up higher than where the closed hood would be if it were closed right now. (If you closed the hood right now, which you shouldn't, these pieces of tape would almost be touching back-to-back, extending up into the air, with the gap still visible between them.)
Now that you have two pieces of tape in the right spot, you want to roll the tape back just a bit on both panels. This means you will fold the tape in half, along its length, with it's non-sticky side touching non-sticky side. You don't want to actually crease it, just fold or curl it back a bit. Maybe enough to almost form a 90 degre angle. Do this on both panels, and make sure that there aren't any sticky parts of the tape that are covering parts of the metal sheet that should get paint. If so, peel and fold the tape back some more.
Next, carefully close the hood. The two separate pieces of tape should meet and stick to one another, leaving two panels which will get paint. If the edges don't meet just right, you can use a credit card to shove them back into the gap and get them to stick. If there is a tiny hole, you can fiddle with it, though I think the pressure will keep paint from an HVLP gun from getting paint in there. The edges, since the tape is rolled instead of flat, will get paint in a feathered manner and prevent hard lines.
You actually have to lay out tape for the entire hood before you close it, but you get the idea. Do the same process for the headlights and doors. When you are done, it should look something like this:

I used a similar process on the hatch. I stuck tape to the INSIDE edge of the hatch, with a bunch of tape sticking up past the panel edge, then folded it back (non-sticky sides together)and then applied paper to the tape. This also came in handy on the gas cap area.
I spent a total of 4 hours taping and masking up the car. And that was almost hurried, since I wanted to get paint on today before the aluminum panels all re-rust.
Total for the first half of today: 7 hours (3 metal prep, 4 taping)
Original Tube Tape, get quality best automotive masking tape use to fill the larger gaps. Buy original automotive masking tape to works on all types of vehicles.
ReplyDeleteGreat PostAutomotive car masking tape ; mask your car door, hood gaps on trucks or cars fast &a easily by tube tape. You can SAVE up to 20 minutes of masking time per car.
ReplyDelete