Thursday, September 30, 2010

Spraying 2k filler primer on extra parts

With the spare parts all prepped for Filler Primer, I mixed some up and sprayed the parts. I sprayed the front spoiler (not in the pic), the bumpers, the mirrors, the gas cap, the rain rails, and the sunroof (which you can see on the edge of this pic, about to get sprayed.)

Don't forget to clean your parts off well with wax and grease remover to get all the dust off before you spray. It took about two hours to prep, mask, spray these parts and cleanup the gun. If my math is correct, I'm now 100 hours into this project. Wow. This is sure taking longer than the one long weekend I had budgeted to get the whole thing done!  ;-)


Time spent today: 2 hours
Money spent: $0

Tuesday, September 21, 2010

Guide Coat and Beginning Block Sanding

Now comes what will probably be the single most time consuming part of working on this car: Block Sanding. In theory, using long blocks of stiff material to back the sandpaper, I must sand the whole car with a low grit paper (I'm starting with 180 grit), thus leveling all of the high and low spots perfectly. Then the whole car again with 400 grit, and then again with 600 or 800 grit. My next coat, the Primer Sealer, calls for the primer to be sanded to 400 or 600 grit. Check your product to see what grit you should finish with. I think 180 was plenty good to start with (no need to start block sanding with a 60 or 100 grit.), and the step from 180 to 400 was fine, with no between grits necessary.

You could do all this leveling by feel, or buy a spray-can of SEM 38203 Guide Coat (black). I've heard of people using old black paint (which can gum up sandpaper excessively), or using brush on black dust (which is more messy but sand off more easily). I got this because it was there and cheap: $6.


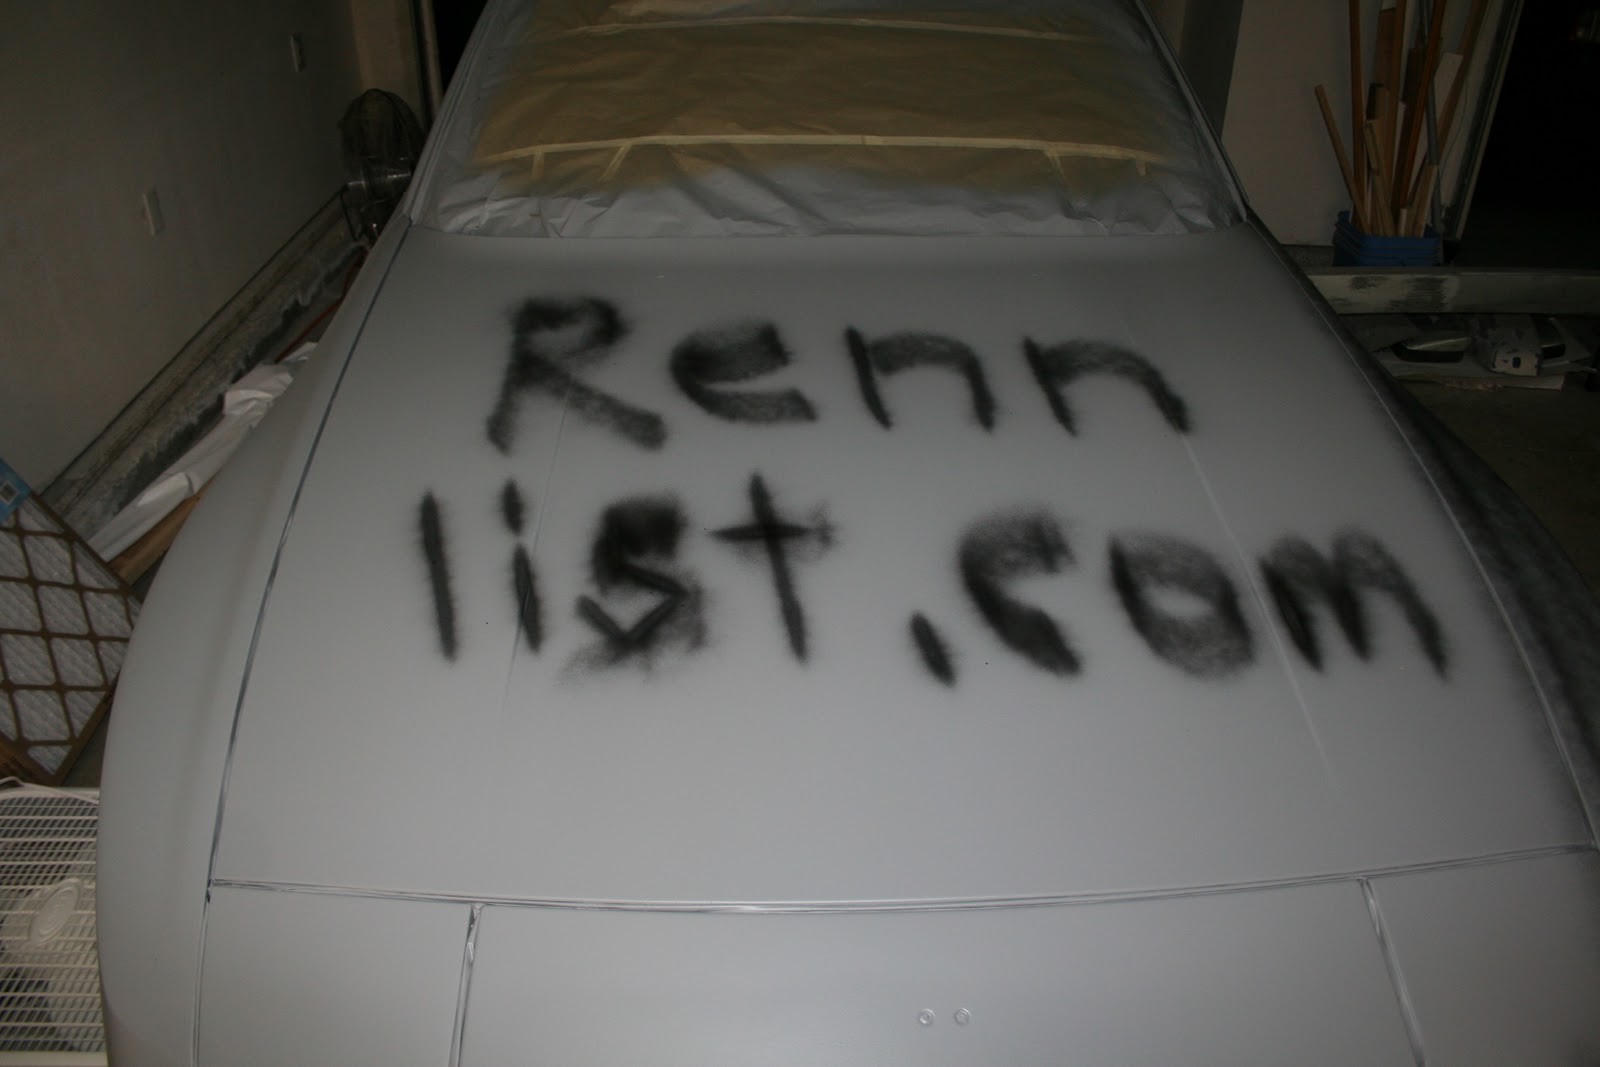
I decided to give a shout out to the forum that has been one of the best 944 resources for me, and to try my hand at graffiti, which I've always been too chicken to try. Spray painting words on a car felt all kinds of wrong... and fun. Good thing it sands off fast.


Once I was done playing around, I went around the whole car with the spray can. In retrospect, I was too close to the car, and ended up getting a pretty thick dark coat. It doesn't really matter, except that I used most of the can of guide coat up, when I probably could have dusted the whole car with half the can and gotten the same results.

Once the guide coat is on, you slap your sandpaper on your blocks and start sanding. Again, I'm using the Durablock 6 block system I got on ebay, which is already figured into my material costs earlier in the project. I will ultimately use mostly the 16" block for huge spaces (hood and doors), the 12" block for most of the rest of the car, with some limited use of the tubular block on the fenders and back of the car, and the short 4" block when the 12" block was just to big to get into tight spaces. If you are on a budget, you could do a 944 with just the 12", and 4", and pick up the round cylindrical block if you have a few extra $. The rest of the blocks weren't essential.

Below, you can see some typical block sanding in progress on the right side of the hood, looking from the fender (using a short block and 180 grit so you can see the different progress in one photo). On the far right of the picture, maybe the right-most 20%, you can see it is un-sanded. Just to the left of that, in the next 20%, you can see the "X" marks from me starting to cross-hatch as I sand a few strokes in each direction. (You always want to sand in an X pattern to keep from leaving grooves from the paper and to avoid the edges of your pad from digging in. There are loads of tutorials and videos on You-Tube about this.) Just to the right of the middle of the picture, you can see I'm taking the top off the rough texture, but there is still some substantial guide coat still left down in the bottom of the orange peel. This is also when you will start to notice high and low spots. The high spots get lighter, and the low spots stay dark. Keep sanding the whole panel evenly, but stop if you start to go into your etch primer, and stop before you go down to bare metal. On the left-hand side of the picture, you can see a few faint low spots that I was trying to sand down to, but there was one stubborn high-spot where I sanded down to the etch primer, which is clearly green. (Thank goodness for contrasting colors of primers. This would be a pain if they were both gray.) From here, you can do the wrong thing (avoid the high spot and just focus on the low spots, which leaves your panel uneven and with a high spot. Or you can hammer down the high spot. A great DIY trick I saw on a video was to take a thick solid metal spatula, hold it over the high spot, and gently hammer all around the high spot. The flat metal of the spatula distributes the force of the hammer, and keeps you from messing up the paint or metal. It also keeps you from hammering too far and ending up with a low spot. Spray on some more guide coat, and get back to sanding, hoping everything has evened out.


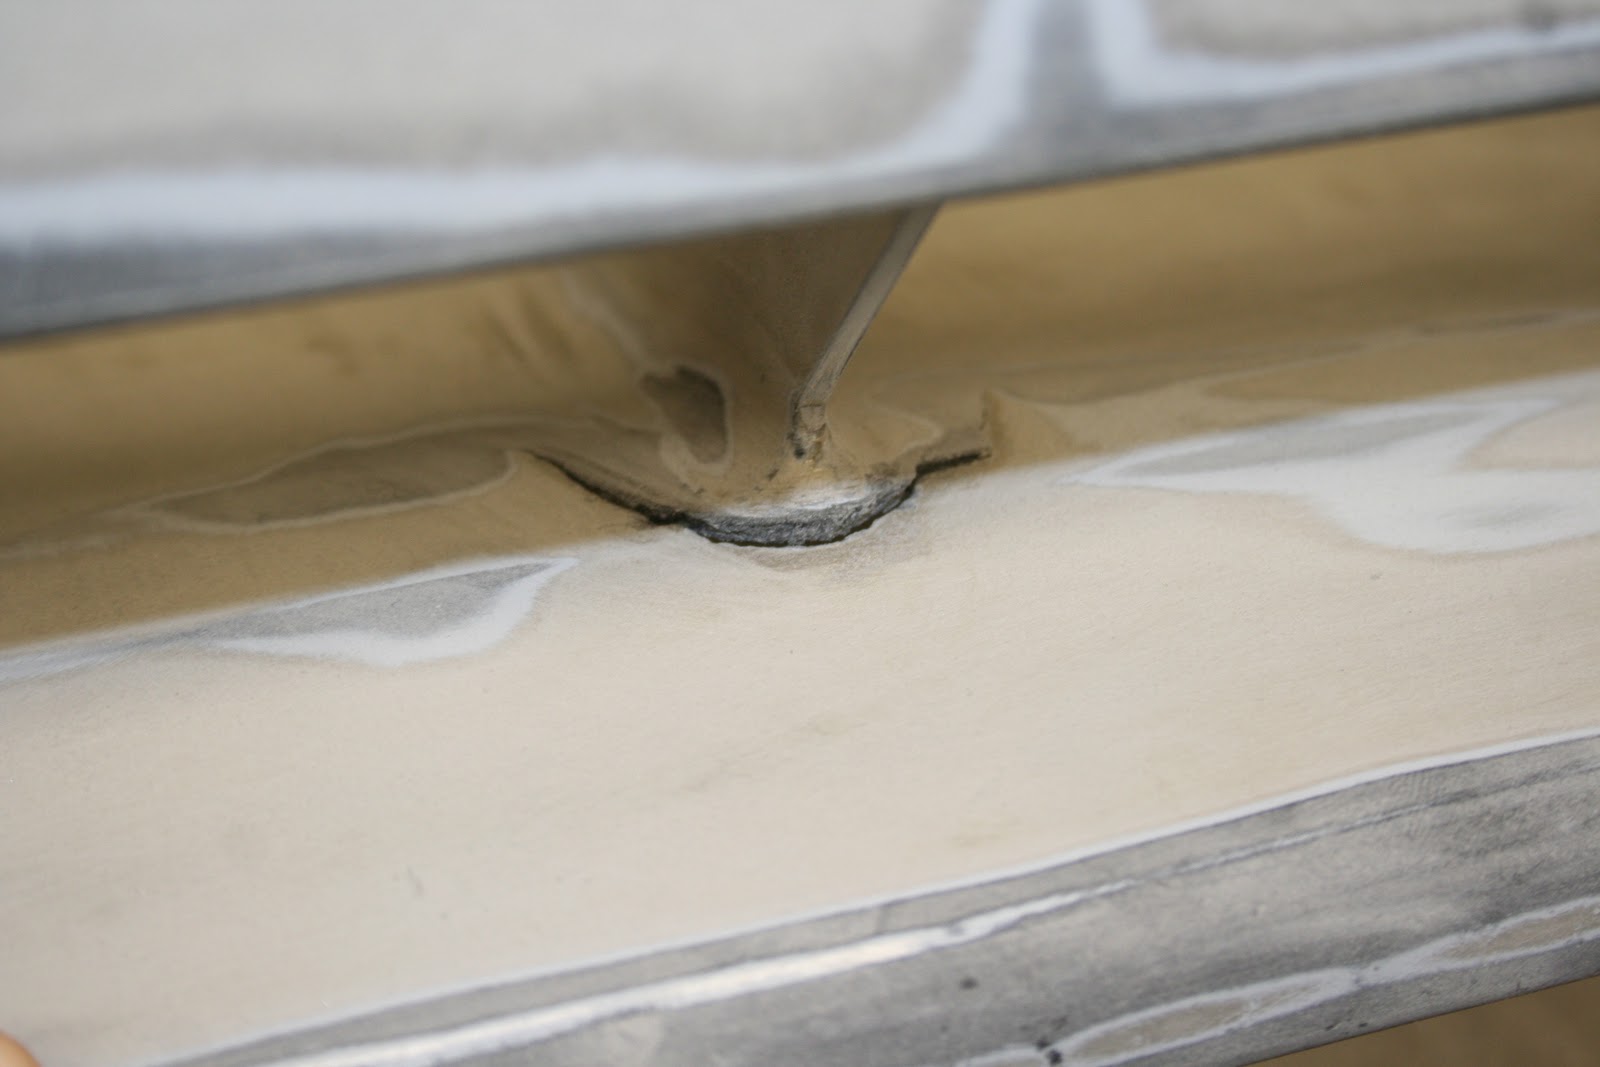
Here is some more work on the hood, with a couple of clear spots where the etch primer is showing through.


And a close up of the middle of the hood so you can get a better feel for what a 'sand-through" looks like. In retrospect, I shouldn't have gone this far, and should have fixed the high-spot a lot sooner. But I was scared to do too much hammering, hoping to get the panel flat before I actually got all the way down to bare metal. Don't do this, just hammer it out softly as soon as you see there is a high spot.


One other note. As you sand, the sandpaper loads up with the dust quickly, so that after a few strokes, the sandpaper is 100% covered in a layer of dust and won't sand anymore. You could take off your mask and blow the dust off, or use your hand to knock it off. I found that I could drag the sandpaper across the thigh of my jeans, and it would wipe the dust right off the first time, and I could get back to sanding. None of the books I read or videos I got addressed how to unload sandpaper, but this seemed to be OK.

Here I decided to do a time lapse with photos every 15 or so minutes showing progress on the hood, being more methodical from right to left:


In this next picture, you can see a microfiber rag. You can buy a pack of 10 of these from Costco for about $10. It is a great deal. I got one from my buddy. As you block sand, you end up with a panel covered in dust. If you blow it off with compressed air, or your lungs, you end up with a dust filled room. If you take your microfiber cloth and wipe off the dust, it gives does a better job, faster, with less or no dust in the air, and you don't have to take off your mask to blow the dust away.


Here, the hood is done, and many of the spots where I sanded down to etch primer also had some metal showing. I decided to be prudent, and used some more of the spray-can etch primer on those spots to keep the metal from being exposed. (After cleaning the dust off them and wiping them down with grease and wax remover.) The spray can etch primer is dark gray.


I was able to finish the hood of the car, including the headlights and valance between the lights, and the roof of the car (not including sunroof), in about 3 hours. Here is me being proud of my first big block sanding session. The first of many.


Time spent today: 3 hours
Money spent today: $6 for guide-coat, $0 for microfiber towel.

Plastic parts prep and more etch primer

Back when I sprayed the etch primer, I didn't have the forethought to realize there were a bunch of other parts of the car that were sitting over on the other side of the garage that I probably should have spray with the etch primer. Instead, I finished the car, and had about 8 oz of etch primer left, and should have used it on the parts. Instead, I just sprayed all of the spots I thought I might sand through later on. I put an extra coat on all of the raised body lines (the middle and upper lines on the sides of the car), the ridges on the hood, and every other edge I could find. While this was a good idea, better to spray the parts with the right stuff and not have to buy extra etch primer.

Since the parts that needed etch were just the metal parts, (Ie, side mirrors, gas cap, front and rear bumpers, and the rain rails) I didn't want to buy a whole other quart of etch primer. Instead I just bought a can of spray etch primer. This is single-stage paint in that it comes ready to spray. I interpret this as being sub-par to a two part (or 2k) paint that has a hardener or catalyst to cure it. We'll see over the years if this truly has a substantial difference. This 16 oz. spray can of Sherwin Williams GPB 988 Self Etching Primer cost $13.


The plastic parts don't take etch primer because the solvents and acids in the etch can eat into the plastic and ruin it, or the solvents soak into the plastic only to later screw up the paint you put on later. So, instead, the plastic parts all get a special plastic surface preparation. This is the spray can of plastic prep called: Sherwin Williams Plastic Adhesion Promoter UPO7226. It comes in a 20 oz. spray can for $17.


Here you can see Jesse, my pro painter buddy, paying the etch primer on to the metal parts. You can see how much of a pain those darn rain rails are. They won't sit on a saw horse for painting. (I came up with a great novel solution later on for the color portion of painting, so check that out before you prep or paint yours.)


Don't forget to wear gloves while you paint. They come off a lot faster than paint dried on skin does. Especially when painting these small parts that you have to hold in your hands like in this picture. A long sleeve shirt will also go a long way to keep paint of arms and arm hair. Especially for the plastic adhesion promoter which is clear, and sticky as all get out.


Here you can see that I've got the plastic parts up on saw horses since most of the sides have to be painted. You can also see all the spots I snaded through on down to the black plastic. When spraying this plastic adhesion promoter, lay it on really thin and do a few coats. I got a little over eager laying down a thick coat and it dripped all over the place and I got quite a few big runs and sags. Espcially near the indents where I had to spray a lot to get all of the surfaces.


Total time painting today: 2 hours
Total cost of materials: $30 ($13 for etch primer, $17 for plastic adhesion promoter)

Thursday, September 16, 2010

944 Front Spoiler Bumper Plastic Repair

Why do I keep pulling into a parking space until my front spoiler hits the curb. I don't know. I keep telling myself that I should just park a few feet out from the curb and stop destroying my bumper. Now that it is going to be repaired, and be repainted, I think I'll be way more serious about this.

I've done a bit of research, and '944time' had the best overall info. It turns out that the Porsche 944 bumper is thermoset polyurethane. He even links to a nice textbook from demarlearning.com about plastic repair that is pretty comprehensive. Burton, who I've referenced before many times, also has a good writeup on plastic repairs.

This is my Porsche 944 front spoiler, or air-dam, and it's associated tears, burrs, and cracks. First is the central support that is torn from the bumper folding down and in half at curbs:


The same thing is happening to the driver-side vertical support:


And the passenger-side vertical support:


There were some really expensive and fantastic looking plastic repair materials at the local automotive paint store, and some pretty lousy ones at the local Shucks and Autozone. I opted for the bottom of the line plastic repair kit from the Auto Paint Store. (Which happened to be the only one that cost less than $300, and didn't require a special caulk-gun thing to apply) It is SEM brand Plastic Bumper Repair two-part "stuff" ($10). I don't know if it is epoxy, or plastic, or what. They tell me it will work great on my polyeurethane bumper.

Following direction on the package, I started by cleaning up the area that will be getting the epoxy. I used a B&D Mouse Sander, which has a little sanding arm that works well to get between the spoiler edges. I sanded all the way down to the black plastic:


Don't forget to sand the bottom too! I'm going to be applying a bunch of extra epoxy to the bottom to provide some extra support, and because I have a whole tube of the stuff.


In addition to sanding the are, you also have to cut out a groove that the epoxy will sit in. If there is no groove, then when you clamp everything together, there isn't enough epoxy in the void to hold it all together. So this gives more surface are, and allows for more aggressive sanding after the repair to leave things all flush. It is kind of a "v" shaped notch all along the cut. A sharp carpet cutter or X-acto works well.You can see the groove here as it stands out against the light paint"


Here is the same groove after sanding. I sanded well past the area I think will get epoxy since I don't know how much I'll spread on.


Here I've applied some 2-part epoxy, and have just mixed it on the bottom side of the spoiler. It is kind of like slightly-runny peanut butter. I'm working on this vertical surface and it is just barely dripping. Better work horizontal. I made sure to smush a bunch of epoxy up into the gap from below.


Next up, I mixed up some more epoxy for the top of the spoiler. Here you can see I've done half of the area. You can also see that the crack is well-filled from the bottom. I decided to do the top and bottom simultaneously. This would allow me to set the angles of the spoiler just right once, and because I didn't seel like waiting for it to dry twice:


Here you can see where I've just squirted the two-part epoxy before mixing:


After mixing and smoothing:


Here's the same spot from a lower angle with both sides all smoothed out as best as I could with my little spreader (a small piece of folded up cardboard. You could probably use a putty knife, but these are pretty close quarters and a full size putty knife might not fit.)


This is probably overkill but I wanted to make sure it was tightly held at the perfect angle until it cured. I used a wood clamp to make sure it was just right, and left it for about 30 minutes.


Once it has fully cured, you can go back and sand off the excess. In this case, I left a bit of build-up on it and created a new tapered edge to give the joint more strength. This piece is pretty low, so unless I take this thing to a show, I doubt you could notice it:


Here's an eagle eye view from above the repair:


Here is a better angle where you can see how smooth and feathered the edges are. I spent a lot of time sanding this so it would look just right:


I repeated the process for the two side supports of the spoiler, which weren't nearly as bad, and for one of the mounting bolt-holes on the side. I used about half of the epoxy that I bought on the four repair areas.

I also noticed that the spoiler had a little bit of excess curve on the right side from where the mounting arm had cocked to one side for a few years. I used a propane torch moving quickly over the affected part of the spoiler with direct heat for a minute until it was super-hot to the touch. Then I used my hands to fold and push the panel excessively in the opposite direction, over-beinding it past where I wanted it. I held it like this for a minute, and then let it go, allowing the spoiler to reform to original shape. It took twenty minutes to get it just right, but was worth the time. (You could easily do this one with the spoiler on the car if you were lazy.)

Total time spent: 3 hours
Total Money spent: $10 for epoxy


Wednesday, September 15, 2010

Sanding the mirrors and plastic bumpers

In retrospect, I probably should have prepped all of the parts before I started painting the car, but I was so excited to spray that I'm now going back to do some overlooked prep work. Today I sanded down all the "extra" parts of the car: Rear bumper corners, Rear-view mirrors, Sunroof, Rain gutters, Front spoiler, and Bumpers. I already stripped the bumpers when I was doing the rest of the car, and stripped the Sunroof, but never did anything on these other parts, mostly because they are all plastic and I was told not to use Aircraft Paint Stripper on Plastic, as it can soften and weakened the plastic considerably.
I resorted to good old sandpaper. I started sanding by hand on a small spot of one rear-bumper-corner. After 5 minutes of sanding with 150 grit, this is what I got. You can see the bumper is mostly faded Maaco-paint. Then you can see a layer of shiny factory gold paint, then a white substrate (primer or base-coat), then another layer of gold, then another white primer. Then the black which is the plastic itself:
 
I decided that sanding by hand was going to be too much, and went out and bought a few sanding disks for my 5" round hand sander. (I'm not sure if it is orbital or dual-action. (For plastic parts, I'm not too concerned about overheating and warping.) Assorted sanding disks (80, 220, 400): $10
Here is a picture of the bumper corner, pre-sanding with the faded paint showing. You can see the paint has already started to flake off on the bottom edge where I don't think the paint shop washed the bumper well enough. Sad paint.

Here is a picture of the bumper-corner after being sanded. because of minute variations in the flexible bumper, it didn't sand very uniformly. I feathered as best I could to give everything soft edges, and was OK with the mottled texture here which should sand out in primer. I mostly used the 80 grit which lifted off the paint rather quickly, and then ran back over with the 200 to soften out the scratches.
 
This is the rear-view mirror as it was on the car. The black spots are not from sanding. That is where rocks have hit the mirror and chipped off the paint leaving the aluminum underneath to oxidize to a near-black color. You can also see lots of white spots where the paint chipped off but the primer held. This was probably the worst looking spot on the car. I am really leaning heavily toward putting something on to protect it better. Definitely looking into a DIY clear-bra like this when all is said and done. For the mirrors, and traditional front and fenders too.

Here is the mirror after sanding. I did most of the sanding with my small 5" electric round sander, with 220 paper, and it cut through the paint pretty fast. I took it down to clean aluminum and kept the sander moving to prevent overheating and warping, which I can't imagine being too bad on such a small part.

Next up is the sun-roof. Earlier in the project, I had tried stripping the paint off of it thinking it was metal like everything else. The more layers I stripped off, the more I was surprised that I hadn't yet reached metal. I tried to gouge into it in a few spots, going down about half and inch seeing no metal. I have no idea what this thing is made of, but I got well past the crappy paint, and down into factory paint. Earlier, I spread some nice thick bondo onto the whole panel. (Too much, in retrospect), and spent several hours sanding it back off. I even had to use the 5" electrical orbital sander for a bit to get down through the top layer of bondo. Today, I block sanded the last bit of bondo to perfection, spending about an hour total. I have been most careful working on the sun-roof and hood, since these are the biggest and flattest panels; Ie, visible. The sunroof, especially, since it is right under your nose when you get in the car. It looks like crap, but it is as smooth as a baby's butt. Here is what it looks like now:

 
Next up are the rain gutters that run over the tops of the doors. I don't know what they are officially called (I couldn't find them on Pelican Parts anywhere). These are the biggest pain in the history of mankind. If there was any part of this project that really made me want to just give up, it is these things. I tried to strip the paint off them earlier, applying coat after coat of stripper. All the dips and odd angles kept the stripper from soaking in before dripping off. What's more, they are thin aluminum, so they are very light and are at the oddest angle. There isn't any way to put them on a saw horse, or table to get at the whole surface. I probably spent the better part of two hours just working on these things with the edge of my 5" round sander, then with the extension tip of a Mouse-Sander, then sanding the rest by hand. Aaarghh! I wanted to take these things and melt them down to molten aluminum, mold them into an anchor-shape, and throw them into the deepest part of the sea. I was seriously thinking about just tossing them, since they are semi-functional at best, and serve mostly to cover up the ugly weld between the door body panel and roof panel. Instead I patiently sanded them and worked on my zen meditation. Worst part on the car. Here is one before, and one after. Look, they are so long, I can't even fit them in the picture with any great detail. Dumb gutters!

Last up is the Front Spoiler. This thing is a bear of a part. It is one huge piece of molded urethane. I sanded over it once to take off the Maaco paint, which took about 1.5 hours, and got down to a good base for the new primer and paint to sit on. While sanding, I came across some pretty ugly rips in the plastic, and was torn on how to handle them. I half-felt like just painting over the rips, just as they were, being so close to the ground. Then perfectionism got the best of me, and I decided to fix them up the right way. More on that after I buy some epoxy.

Time spent today: 5 hours
Money spent: $10 on sandpaper discs

Monday, September 6, 2010

Spraying 2k Filler Primer


A few days have passed now since I sprayed on the etch primer. I would have liked to have done it within 24 hours, per the product data sheet, but I ended up having to help my friend move out of his garage. Luckily, he's letting me keep my space here for another month, and I'll have loads of time to work more leisurely.

Because of the wait, it is recommended that I scuff the etch primer before I spray on the 2k filler primer.
I used a maroon scotchbrite to scuff the entire surface of the etch primer, and then went over the whole car twice with Wax and Grease remover to clean off all the dust I created and get the car ready for primer. 
I also spent some time cleaning up my workspace to make walking around the car a little easier, and spent some time re-assembling the spray gun for spraying today. I also decided that mixing the etch primer on the floor was a pain, and found some good counter-space to keep and mix paint on. All this prep took about 1.5 hours. Here is my new workspace. You can see the paper on the wall for testing spray patterns:

For spraying today, I will be using more Sherwin Williams automotive paint products. I will be spraying on the "ACME Finish 1" brand 2K HS Urethane Primer (Product# FP410, 1 gallon, $75). It is mixed 4 parts, with 1 part of 2K HS Hardener (FH411, 1 Quart, $35). There's a good desciption of 1K primer vs. 2k primers vs. epoxy primers here.


This "filler primer", as I will be referring to it, is a high-build, high-solids primer. You could almost think of it as spray-on bondo. You put a few thick coats of it on the car, and then use sanding blocks to take off all the minor ridges and bumps from the primer, leaving perfectly flat panels which look fantastic once painted. Any previous sanding scratches or minor dips or dings can be leveled with this stuff. It also removes orange-peel (ie, highly textured paint) and serves as a good base to spray the paint over. A good application of filler primer coupled with careful block sanding is something that separates a fantastic show-quality paint job from a lousy job. Here you can see a car that could have used some better filler primer and block sanding to even out these panels:
 
I used the same system for painting the car as outlined in the etch-primer section. I knew that any drips or sags would sand right out during block-sanding anyway, so I sprayed it on pretty thick. Once it had the prescribed time to flash-dry (using a kitchen timer), I gave it some extra time, and then sprayed on a second thick coat. Because there are so many solids in the primer, you might need to use a bigger nozzle on your paint gun. I used a 1.8, which worked well for me. The material is so thick that it has a definite texture to it as it cures on the car. Here you can see the distinct orange-peel texture on the front fender after two coats. (see the full size picture):

After going over the whole car twice, I went back and sprayed over many of the edges and ridges that I was worried I might sand through (like the two horizontal body lines on the side of the car, and the two lines down the middle of the hood.), and a few spots that I had noticed earlier had a dent or ding that hadn't gotten filler earlier. Here you can see the results. Again, I didn't spray in a booth since I figured most of the primer is going to get sanded off and end up on the floor anyway. If you have already prepped your bumpers and other parts (sunroof, gas cap, spoiler, etc.), don't forget to spray them now too.

For reference, I only sprayed the main body of the car today, and none of the parts which I still have to prep. I used about 3/4 of the primer I bought. I don't think I'll have enough (primer, money, time or will) to do a second spray and block-sand after the first blocking is done. This is a daily driver, not a show car.

I have read in a few books and heard in general that the primer could be sanded soon after curing, but that you get the best results if it is allowed to sit for a week before block sanding. This allows for complete curing and any shrinkage that might occur. I am in no rush now and will work on some other stuff while the primer cures. Spraying the primer and clean-up afterward only took about 1.5 hours. Here is the garage now that all my friends stuff is out and the garage is all mine:


Time spent today: 3 hours
Money spent today: $110